I have finally reached a result which I am pleased with for my Pmags. I have been working on this for a few weeks in my spare time, and on my fourth attempt, I got it. This technique uses dye, not paint, as a way to change to color of your mags without adding a surface addition, which would increase dimensions, and have durability issues.
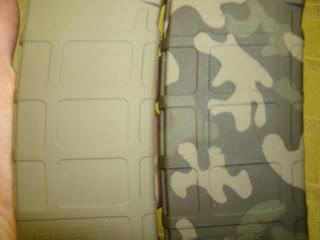
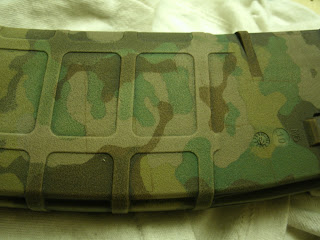
This is my woodland camo pattern Pmag.
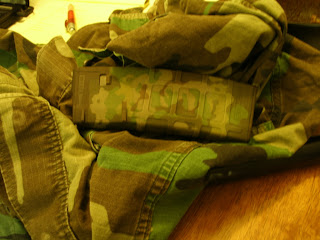
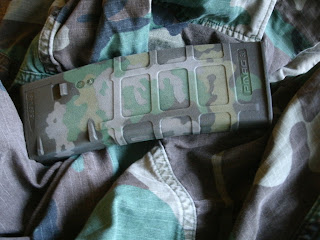
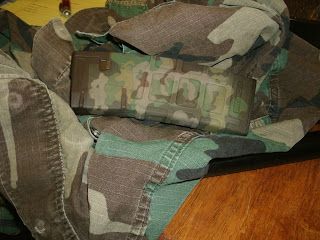
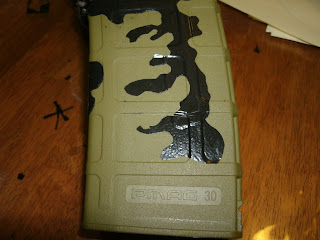
Here you can see the FDE color it started as. This color allows for the best adoption of other colors. You CANNOT dye Pmags lighter colors, therefore, FG is not quite as good of a host. Here you can see how the process starts. Using Scotch brand electrical tape, you can cut the shapes you desire. It is important to use Scotch. others I have tried including General Electric, Duct etc. have all failed. Scotch can withstand 170 degree heat, which is crucial to this process.
In this picture I cut out the shape on a plexi glass surface, and then transferred it to the mag. I found shortly after this though, tapping off a section of the mag, then cutting your shapes and weeding out the trash pieces is far superior technique.
In this picture I cut out the shape on a plexi glass surface, and then transferred it to the mag. I found shortly after this though, tapping off a section of the mag, then cutting your shapes and weeding out the trash pieces is far superior technique.
As said above, cutting shapes and transferring is not as good as cutting shapes while the tape is on the mag then weeding out the trash bits. However, if you do that transfer, clean up the bits that don't look right.
The parts where tape is will retain the color under the tape. Your first tape blots will remain FDE. Once tape is in place you can dip it into the dye solution (explained at the end). On the Left if FDE mag. On the right is the mag dipped in a green color. In the middle that piece is showing the green which will go next.
One thing to note is the way which I cut the shapes. This shape started out as a square made from 2 lengths of tape side by side, overlapping a bit. I "took bites" from the square to get a rough shape.
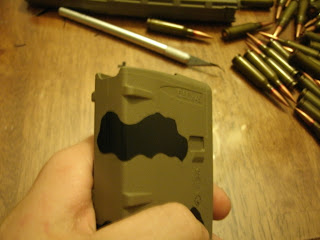
However, to make it look even better I took additional "Bites" from that, to make it look more natural and less of a man made sloping curve. The holes in the middle of the tape "Blob" make for a very nice effect in the finished product.
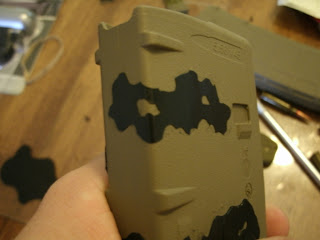
After the first dip, producing a light green color, rinse the Dye Wash off, and blot dry with a towel. You will do this between each color. Next, you leave the first set of tape, and add more to it. At the top of the picture along the spine of the mag, you can see I took off a sliver of tape from the first set, exposing some of the underlying FDE. When I dip this mag into the more vibrant green pictured in the 6th picture of this article, the FDE will react different than the light green, giving a secondary color.
You can also see the first stage of tape being left alone and a second stage going on, with an overlap.
You can also see the first stage of tape being left alone and a second stage going on, with an overlap.
It is important to incorporate an overlap of color splotches. If you do not have over lap, your mags will look like my first attempt at Woodland Camo, which is the next picture down.
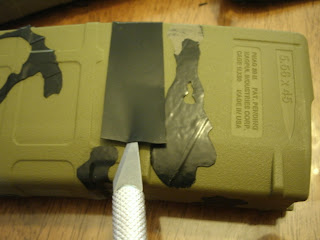
Here you can see at least 2 fatal mistakes. The shapes did not have "Secondary Bites" taken out of them, as well as no overlap. The result looks like the camo you get for little children's bibs for mealtime.
This is a little later in the sequence following the photo pictured 2 above this one. You can see that piece of overlapping stage 2 tape has now taken its own shape. I also have a few "Secondary Bites" taken from the blob, with a few more to come.
At this point you would continue adding stage 2 tape. remember anything under stage 1 will stay FDE, anything under stage 2 will be light green. Once all stage 2 tape is in place, dip into the more vibrant green. Then you repeat again with stage 3 tape. Dip in brown at that point. Stage 5 follows with a final dip in a Dark Grey, Dark Blue, or Black if it fits your environment.
Here are a few more random pics.
Here are a few more random pics.
Oh and the inspiration for the light green color, and the "Secondary Bites"? This mold growing on a bowl of tomato soup left out over the weekend while I traveled.
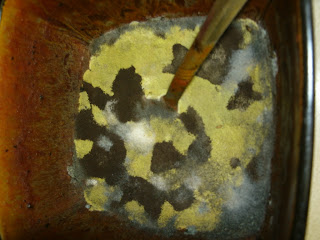
The process of making the colors that are right for you is the time consuming part. Luckily none of this project consumes very much money. I get my Rit Dye, in the liquid form, for $2.50 a bottle. each bottle is 8 ounces. To make a pot full of the dye wash, I use anywhere from 25-175 drops of dye from a medicine dropper. Your dye will last forever, at that rate.
Here are the recipes for the Light Green, which is very close in color to the light green mold, and the vibrant green.
Here are the recipes for the Light Green, which is very close in color to the light green mold, and the vibrant green.
Light Green: (double batch)
4 cups water
6 drops Royal Blue Rit Dye
320 drops Lemon Yellow Rit Dye
-Mix and heat in pot to 175 degrees.
-Allow the magazine with the tape to come up to heat in the over set on low. By doing this the tape has time to relax with the heat, and will not be shocked by dunking it in near boiling water, leading to smearing.
-Once the mag is hot to the touch, take it out of the oven and while sandwiched between a towel quickly apply pressure to re-seat any edges of the tape which may have come lose.
-Dunk in the Dye wash. If you don't have a pot allowing full submersion, you can use a frying pan, and ladle liquid on the top side, and flip every few minutes. This will yield a consistent, even color. This specific light green requires 175-180 degree Dye wash, which is just at the limits of the tape. Even a few degrees less than 175 can make the dye process take 30 minutes for this one color, instead of 8-10. Basically you can take the magazine out of the Wash whenever the color looks good. If you take it out prematurely, rinse and blot dry, and throw back into the Dye Wash.
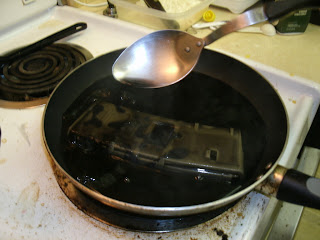
Vibrant green shown in Picture 6 of this article. This green is used more than the light green.
3 cups of water
26 drops of Kelly Green Rit Dye
-Mix and heat Dye wash
-Heat mag with tape in the over on warm to avoid shocking the tape
-Once hot, remove mag from oven, sandwich in a towel, and apply pressure to reseal any lose edges of tape.
-Dip in dye wash for up to 25 minutes. The closer the dye wash is to 180 degrees the shorter the time.


