Monday, July 29, 2013

Pindo/Jelly Palm Part 1

Last week here in Florida was the first week I was able to get my hands on some ripe Pindo fruit. I have some ideas with it this year which will be different from previous years but for this installment "Part 1" I'll be going over the process of getting juice, with which jelly can be made from later, or wine if that's more your style.

Step 1: Collect fruit. I prefer the yellow, golden, or light orange colored fruit. The ones with much red seems to be not as good, and any green indicates it needs more time ripening, which this fruit does very well sitting in the front seat of your car as long as it's still attached to the main stem.


At this point there are 2 routes to choose. Cut the pits out, or keep them in and boil away. Cutting the pits out is great if you need the fruit and pit separated, like if you want to press the very oil filled pits for their oil, or keep the left over fruit for another project, this really only works for fruit at a exact time of ripeness when they are about as firm as an apple, but not yet to the firmness of a good peach. However, keeping the fruit whole and just boiling it a bunch is less labor intensive and works well at any level or ripeness. I'll go over the cutting process first.

Step 2: Cut across the fruit to make 2 halves. Twist the 2 sides until one separates from the pit.


Step 3: Cut the halved fruit again in half and peel off which over quarter is the easiest. The last quarter is not usually too bad if you have small thumbs that can dig in around the pit and dislodge it out of place. (Sorry no pictures here).

Now I will back track and go over the method of just keeping the fruit whole and boiling it all.

Step 2 Alternative: De-stem all fruits, rinse. Throw whole fruit in pot and cover with water. I found a pressure cooker was way faster since it can reach higher temps. If you just have a pot though be patient. you want it all to cook down till you can easily mash the fruit.

Step 3 Alternative: Crush the fruit as best you can. The pits make a total crushing motion stop at some point.


Ok all back together now for Step 4.

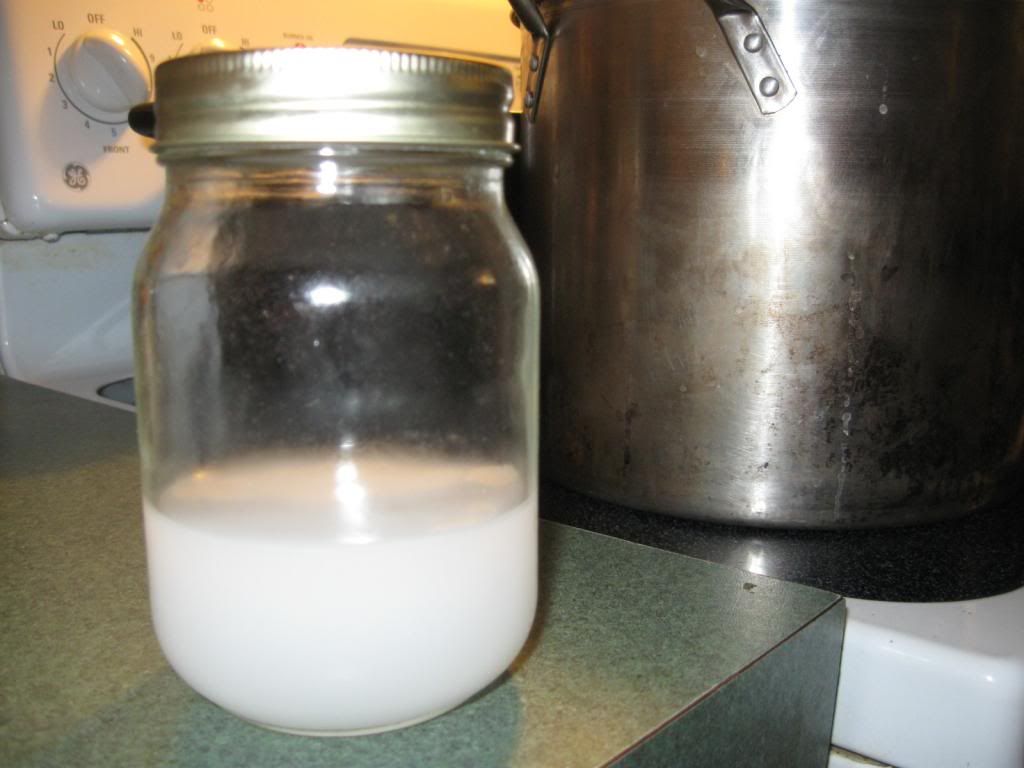
Step 4: Strain the liquid out, best to do this with a colander and a large bowl to compress the fruit for any last liquid they hold.

Step 5: I like to go one step further and really get all the fibers of the fruit out. A strainer does real well with this.


At this point you can freeze it, or keep it in the fridge for a few days. I'll be making jelly with mine the next time I get a free day. Wine is also supposed to be a great option for this.


Monday, June 10, 2013

Blackberry Lime Jelly

Black berry season is just coming to a close where I am. If you are lucky enough to be in mid season still, this is a great recipe to try.

Step 1: Gather and wash black berries.


Step 2: Throw them in a blender with some water, not exact science here, about 1/3 or 1/2 way up the blender.
Step 3: Blend them until they are pretty liquified.
Step 4: Pour through a strainer, splash guard like me, or some cheese cloth, you want to strain out the seeds. If you use a splash guard a spatula or spoon is helpful. Try bouncing the whole thing off the rim of your bucket or bowl about 2-3 inches repeatedly, this helps dislodge the drippings which cling on to the underside of the fine mesh. it should be the consistency of hair jell at this point.
This is after a minute of bouncing and stirring
Eventually you'll end up with this goop, the part we want.
If you're short on berries and want to take the most out of this process, put the seeds back in the blender with more water and repeat. I went from 1.5 gallons of berries to 4.5 cups of seed goop. After blending the seeds with water and straining a second time I had 3 cups of seed goop.
Step 5: Put 2 cups of this berry mash and 5 cups water into a pot. Add 1/2 cups lime juice.
Step 6: I use Pamona's citrus pectin. It needs a sodium solution to jell. If you use sure-jell or Ball pectin, follow thos instructions. For Pamonas you will now want to add your 1/8 cup of the sodium solution.


Step 7: Bring this to a boil. While you wait add 3 cups sugar and 1.5 Tablespoons of the pectin to a separate bowl and thoroughly mix. Sorry no picture.

Step 8: Once your pot of juice, water, and sodium are boiling add the sugar/pectin and mix well. Bring back to a boil. At this point if you want to can it, go 10 minutes in a water bath. If you want to keep it in your fridge, at this point throw it in a Tupperware and enjoy.