Monday, March 28, 2011

Training


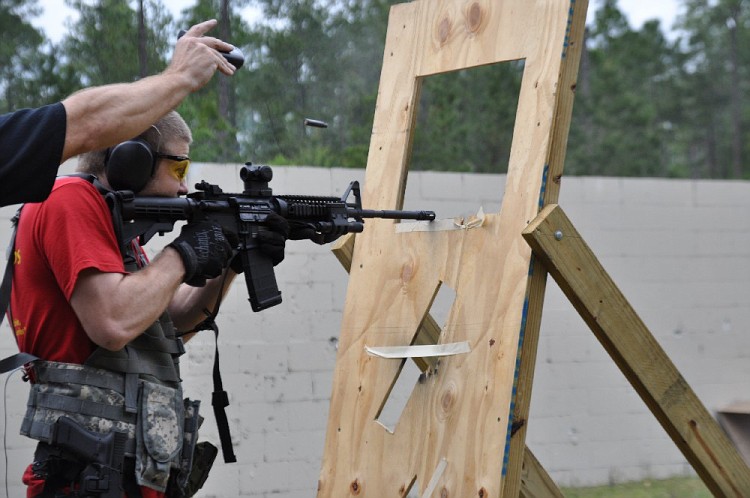
Over this last weekend I had the opportunity to go with a good friend to a defensive carbine course and hone my skills, or start to develop them, after all, I was not very good to begin with.

Either way, I feel more prepared, more confident and more able to be proficient since the class took place.


Underestimating training or skill building activities is something I hope to never catch myself doing.

Anyone can survive a disaster if they have MRE's, a location so isolated defending it is not a concern, access to a spring, a shelter to support them, and some form of entertainment to prevent insanity or suicide.

But for me, I don't have that set up. It is my skills that give me the advantage. Every thing from building fire from flint, a battery, a magnifying glass or 2 sticks, to purifying water with charcoal, sand, and a t shirt. I can create shelter from what I find in the forest, I can catch small game while I sleep from my knowledge of snares.

These are things that you don't go buy at the store and package in mylar bags. These are not things you store in the corner of your basement for a rainy day.

Skills and training take time to develop, and energy to maintain, but they are what can give you the advantage over others you are competing with.

I cannot give a simple guide with 10 pictures to lead you through building these skills. It is something that takes hands on practice. That is why I am making a goal to more consistently spend time building my skills, and you can do the same.

Sunday, March 6, 2011

Homemade seasonings


In the post I made after Christmas I gave a short "how to" in reference to dehydrating bell peppers.

I recently bought a seasoning package and noticed one of the seasonings contained dehydrated bell peppers, that appeared to be ground up.

I'm great at borrowing ideas.

Note: This is very similar to the tomato powder.

Step 1: Start with dehydrated bell pepper.

Step 2: Throw them in a coffee grinder, blender, food processor etc. and blend


Done. Add to an old spice container if desired.

This is such an easy way to store bell peppers. It is quick and easy, and the results are great.

I added 1/8 teaspoon pf this powder to 4 scrambled eggs and it was phenomenal.

With the similar tomato powder, I will add that to mayo which then gets slathered on a sandwich and it is great.

Or you could add this to some chili, for a more enhanced bell pepper taste.

The possibilities are endless.

By the way that little spice container held the powder of 11 green bell peppers, Talk about a light weight, low volume way of storing stuff. I bet this has a close to infinite shelf life as well.

Enjoy!

Wednesday, March 2, 2011

My homemade tortillas


In the post from the other day I identified breakfast burritos as a great cheap meal. In order to keep it at it's cheapest, you have to make your own tortillas.

If you have more time than money, like me, its 100% worth it. If you are an attorney, doctor, etc, spending an hour to save $3 isn't quite the ROI you're looking for.


Anyway the 411.

For the individuals concerned with organic eating or if you have a general concern with the stuff you're consuming, check out store bought tortilla's ingredient lists. They have like 25 items. The truth is, you only need 4.....


Step 1: Combine your flour and salt.
Step 2: Add your shortening. Don't stress too bad about getting the shortening totally mixed.
Step 3: H2O

Step 4: Stir away.

There comes a point where mixing with a fork or spoon or whatever, just doesn't really do the job. It is here, that you will get your hands messy and start to kneed.

Step 5: Knead for a few minutes. I try to knead the entire dough ball for 2 minutes and then knead the individual clumps that will form the tortillas, for another few minuets a little later on in the process. You can rub it down with some oil and set it in the fridge for 4+ hours if you want. It's supposed to make the dough more workable down the line.
Step 6: Break the dough ball into 8 evenly sized balls. It does not need to be exact.

Step 7: Before you roll out the dough knead the crap out of it. The more you knead the easier it will be to work with the dough. Roll it very thin. It takes a good amount of flour on the counter and rolling pin.

Step 8: On an ungreased HOT pan, throw the rolled out dough. It will accumulate bubbles, and turn a slightly different color. It's not like french toast, that breaks apart if you flip it a million times, which is good. You can flip it every 10 seconds if you want. I do that to ensure it doesn't get over cooked on either side.